I got this idea from Jean's Crafty Corner(She's got awesome Halloween Craft Ideas!):
http://jeanscraftycorner.blogspot.com/
Its a thick book, I think mine was 966pages. First you tape the binding front cover and back cover pages together, then you take everypage and fold it into itself, about 30% of the way. It's supposed to come out a full circle, mine came out a semi circle! It still looks really cool though! It takes awhile to actually fold the pages but it's not that bad if you take breaks. I really like the way it looks, you can add decals to the book to make it look like a face, but I liked it enough plain that I decided to stick with it and use it as decoration instead!
Wednesday, October 20, 2010
Bookmarks!
Yesterday I was talking to my brother about his new book, The Red Pyramid By Rick Riordan(Author of the Percy Jackson and the Olympian books). He was telling me how far he was into reading it and then told me what page he was on. I was like how do you remember and he said he had to because he didn't have a bookmark! So I made him two bookmarks last night, one is themed for the book itself 'The Red Pyramid' and the other is Disney theme! To make them I used old pieces of cardboard and scrapbook decals. I also colored a triangle piece of cardboard red for the pyramid. Then I drew a hieroglyphic that was used in the book that meant 'open' and put stickers on the other side of the pyramid to mean 'Open & Escape'.
The Disney theme bookmark I used two mickey mouse decals, at the top and glued them together at the top of the cardboard piece. Then I took other Disney images(A flying ship from Peter Pan) and glued it on the rest of the cardboard available. All of my images and decals were from the paint department in Home Depot, for free! I also added the sticker that says 'Magic'.Mini Pumpkins!
This is what my brother and I did with our mini pumpkins that my Mummy got us. We broke out the sharpie and decided to draw on them! It was super fun and really easy! All I did was layed out a piece of paper on the table and put his pumpkin on it, handed him the marker and off he went. Simple 5 minute craft!
My Purse Tote Bag #2
This is the finished product on the other side of my tote bag that I made to take to Disneyland with me, and to match my Snow White costume. I took a sharpie and colors lines on the hand to make it look more weathered, and I dress lines on the leaves.
More of My Halloween Scrapbook
Some new Scrapbooking pages I did for my Halloween Album I have been working on. My family is sooo excited be to going to Disneyland!!! I really only have one page left to do but I want it to be a contast of Sleeping Beauty's castle durring the day and night so I'm not sure how the page will turn out quite yet. Here's what I have so far:
 |
| "Defrightful" |
 |
| Disney Family, pretty proud of my Disney freehand! |
 |
| A page for my Mummy, it says 'A Charmed Life' She wanted the purple Mickey Mouse decals. |
 |
| 'Create Magic, Bloom moments, Grow fun' On my Mummy's fairie page. |
 |
| This is the dance page I made, since they are having two dance parties durring Mickey's Halloween Party. |
 |
| I added "Who's the fairest of them all?" I also added my name haha |
 |
| The caption says "Nothing is worth more then this day-Gothe" and I also spelt out Halloween across the pages. |
 |
| The bubbles say 'Fall", "October" and "Family" |
Monday, October 18, 2010
Tote bag Purse
I made this tote bag purse out of a dollar bag I got from target. Then I took one of my brothers old tee shirts that doesn't fit him anymore and I cut out two sides. After I had the two cuts of fabric I sewed them to the tote bag to cover the target symbols. I also did it because we are going to Disneyland for Mickeys Halloween Party and I wanted to have something that the characters could sign. So by making this tote purse I can get them to autograph it. Since I am going as Snow White I also added an apple to each side of the tote. On one side a hand holding the apple, and the other side a pop out apple that I stuffed with cotton. I also sewed on a botton so I can keep it closed.
 |
| You can see the Tee Shirt I used to cut out the panels. |
 |
| The reverse side with a 'pop out' apple which I stuffed with fluff. |
Taco Salad
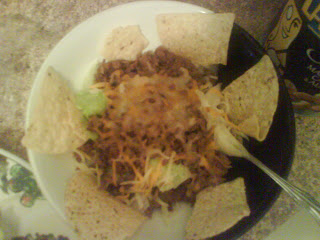
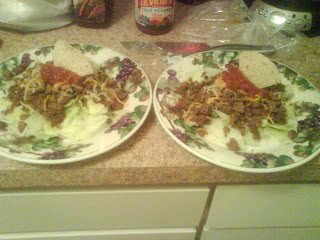
I made taco salad for dinner last night! It was really good! All I did was layed lettuce, then added my sataued ground beef with onions and garlic(along with taco seasoning:paprika, cumin, oregano, and chili peppers)and top with cheese and wait till it melts then put on a dallop of salsa and stick in a tortilla chip! So simple!
 |
| For my brother, a taco bowl without salsa, and extra chips! |
Christmas Cards!
The other day I was in Taget and they had all of these cards in the dollar section. It comes in a set of four and comes with some little bows and stickers and you make your own cards! Such a fun and cute activity! (And not bad at all for two dollars!)
Book of The Week
This week I started reading Diana Gabaldon's, Dragonfly In Amber. It's the second in her seven part book series. I read the first one, Outlander, a few monthes ago. My best friend highly recomends these books and has already finished this second oneand is onto the third, so I need to catch up! It should be easy...only 947 pages right! haha The books follow Claire Randall as she travels through time and love.
 |
| Page 23! (It's Crrazzy!) |
Scarf Project!
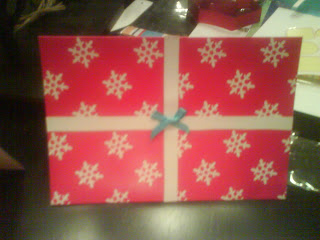
I made this last week and took a bunch of pictures to share! I knit it using 14" aluminum knitting needles. I made it Black and White, but a very long length of each color till I switched so it wouldn't look like prison stripes. At the end I put on an 'A' with a twirl finish. I made it for my mom and her name starts with an A, Ailsa: http://www.buildyourownhouse.ca/ The A is what took me the longest! That was probaby because Jersey Shore was playing in the background....Oh yeah! Before I gave it to her I 'wrapped' it by rolling it and then using yarn(instead of ribbon) by doing the crossover behind the back of the scarf after I wrapped it around the width and the length when I tied it into a bow on the front of the package, I cut open the loops of the bow and made those into a smaller bow, and continued till it looked like a flower.
Subscribe to:
Comments (Atom)


